Today I want to share installation of JBoss EAP for Java. This is the third post, part of JBoss Web-Application Cluster.
Here is prerequisites before to start JBoss EAP for Java installation:
1. Mount RHEL DVD
# mkdir /media/repo
# mount -o loop /dev/cdrom /media/repo
# ls /media/repo/
2. Make RHEL DVD as repository
# vi /etc/yum.repos.d/dvd.repo
[RHEL6.3-Repo]
name = RHEL 6.3 DVD Repo
baseurl = file:///media/repo
enable = 1
gpgcheck = 0

[RHEL6.3-Server]
name = RHEL 6.3 DVD Server
baseurl = file:///media/repo/Server
enable = 1
gpgcheck = 0

[RHEL6.3-ResilientStorage]
name = RHEL 6.3 DVD ResilientStorage
baseurl = file:///media/repo/ResilientStorage
enable = 1
gpgcheck = 0

[RHEL6.3-LoadBalancer]
name = RHEL 6.3 DVD LoadBalancer
baseurl = file:///media/repo/LoadBalancer
enable = 1
gpgcheck = 0

[RHEL6.3-HighAvailability]
name = RHEL 6.3 DVD HighAvailability
baseurl = file:///media/repo/HighAvailability
enable = 1
gpgcheck = 0
3. Ensure RHEL DVD is enabled as repository
# yum repolist
4. Auto-mount RHEL DVD after boot (Optional)
# vi /etc/rc.local
#!/bin/sh
#
# This script will be executed *after* all the other init scripts.
# You can put your own initialization stuff in here if you don't
# want to do the full Sys V style init stuff.

touch /var/lock/subsys/local
mount -o loop /dev/cdrom /media/repo
5. Turn off iptables and unregister it from startup service
# service iptables stop
# service ip6tables stop
# chkconfig iptables off
# chkconfig ip6tables off
6. Disable SELinux
# vi /etc/sysconfig/selinux
# setenforce 0
# getenforce 0
7. Use hostname instead of using IP address
# vi /etc/hosts
127.0.0.1      localhost localhost.localdomain localhost4 localhost4.localdomain4
::1            localhost localhost.localdomain localhost6 localhost6.localdomain6
200.200.200.50 ews-vip
200.200.200.51 ews-node1
200.200.200.52 ews-node2
200.200.200.53 eap-node1
200.200.200.54 eap-node2
200.200.200.55 jon-node
8. Edit local hostname
► EAP node 1
# vi /etc/sysconfig/network
NETWORKING=yes
HOSTNAME=eap-node1

► EAP node 2
# vi /etc/sysconfig/network
NETWORKING=yes
HOSTNAME=eap-node2
Let’s start installation of JBoss EAP for Java:
1. Ping test from each other
► EAP node 1
# ping eap-node1

► EAP node 2
# ping eap-node2
2. Install JBoss EAP
# cd /opt/
# yum -y install unzip
# unzip jboss-eap-6.4.0.zip
3. Install Java
# rpm -Uvh jdk-8u45-linux-x64.rpm
4. Verify Java is installed
# javac -version
5. Install required packages
# yum -y install apr apr-util openssl
6. Configure JBoss EAP HA
► EAP node 1
# cd /opt/jboss-eap-6.4/bin/
# vi /opt/jboss-eap-6.4/standalone/configuration/standalone-ha.xml
<interface name="management">
 <inet-address value="${jboss.bind.address.management:200.200.200.53}"/>
 </interface>
<interface name="public">
 <inet-address value="${jboss.bind.address:200.200.200.53}"/>
 </interface>

► EAP node 2
# cd /opt/jboss-eap-6.4/bin/
# vi /opt/jboss-eap-6.4/standalone/configuration/standalone-ha.xml
<interface name="management">
 <inet-address value="${jboss.bind.address.management:200.200.200.54}"/>
 </interface>
<interface name="public">
 <inet-address value="${jboss.bind.address:200.200.200.54}"/>
 </interface>

Find above configuration, then replace 127.0.0.1 to JBoss EAP node IP address.
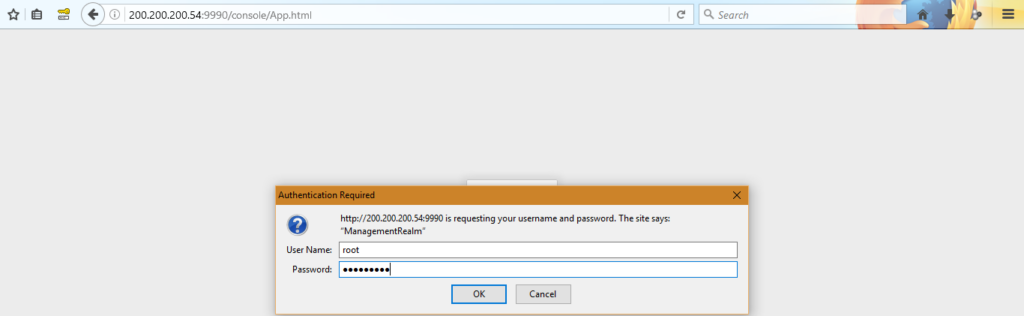
7. Create administrator user for JBoss EAP management
# ./add-user.sh

► Choose a option
► Fill username for JBoss EAP management administrator user
► Answer yes to confirm username
► Fill password for JBoss EAP management administrator user
► Re-type entered password
► Just skip/enter for group information
► Answer yes to confirm account creation
► Choose yes to make user represents a remote JBoss EAP 6 server instance
8. Register JBoss EAP as startup service
# mkdir /etc/jboss-as
# cp /opt/jboss-eap-6.4/bin/init.d/jboss-as.conf /etc/jboss-as/
# cp /opt/jboss-eap-6.4/bin/init.d/jboss-as-standalone.sh /etc/init.d/
# chkconfig --add jboss-as-standalone.sh
# chkconfig jboss-as-standalone.sh on
# mkdir /var/run/jboss-as/
# mkdir /var/log/jboss-as/

Replace and un-comment #JBOSS_USER=jboss-as
# vi /etc/jboss-as/jboss-as.conf
JBOSS_USER=root

Replace JBOSS_HOME=/usr/share/jboss-as
# vi /etc/init.d/jboss-as-standalone.sh
JBOSS_HOME=/opt/jboss-eap-6.4

Replace JBOSS_CONFIG=standalone.xml
# vi /etc/init.d/jboss-as-standalone.sh
JBOSS_CONFIG=standalone-ha.xml

Start JBoss EAP service
# /etc/init.d/jboss-as-standalone.sh start
9. Check with browser to ensure JBoss EAP service is running
► JBoss EAP node 1
https://200.200.200.53:8080

► JBoss EAP node 2
https://200.200.200.54:8080
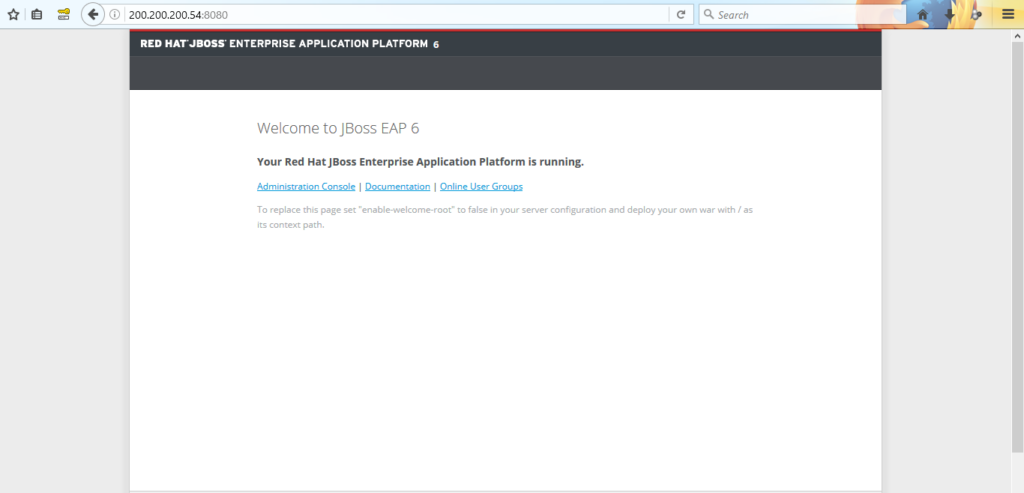
10. Login with created administrator user to JBoss EAP management with browser
► JBoss EAP node 1
https://200.200.200.53:9990

► JBoss EAP node 2
https://200.200.200.54:9990
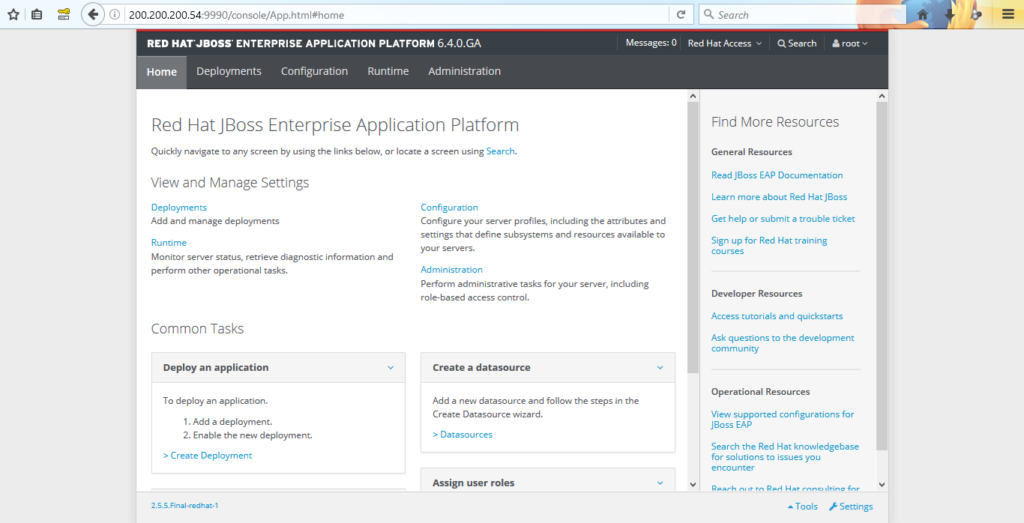
11. Patch JBoss EAP
► Navigate to Administration and a message will prompt
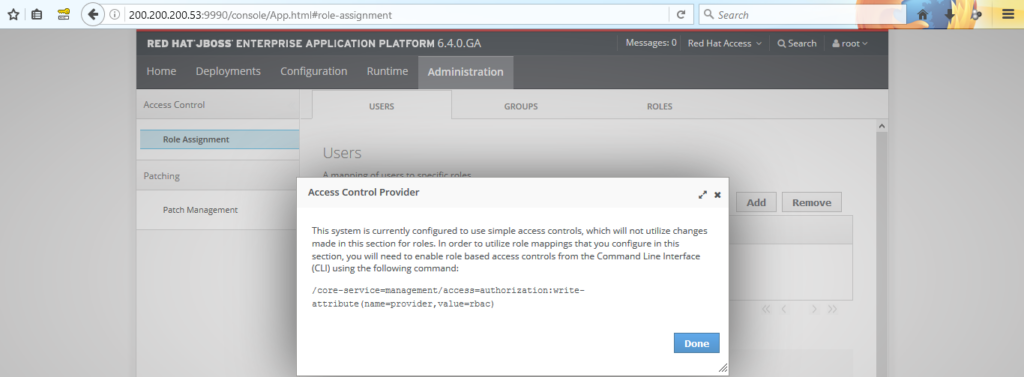
► Navigate to Patch Management and click Apply a New Patch
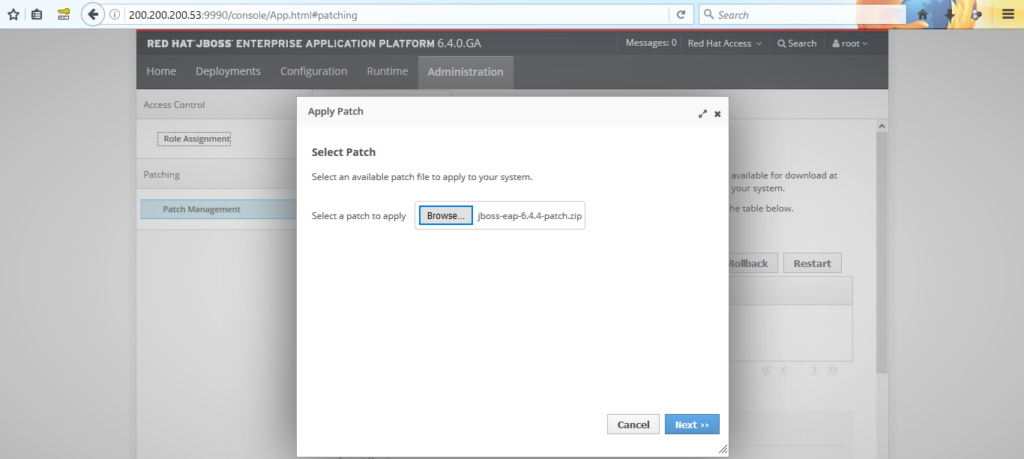
► Click Browse to choose JBoss EAP patch and then click Next >>
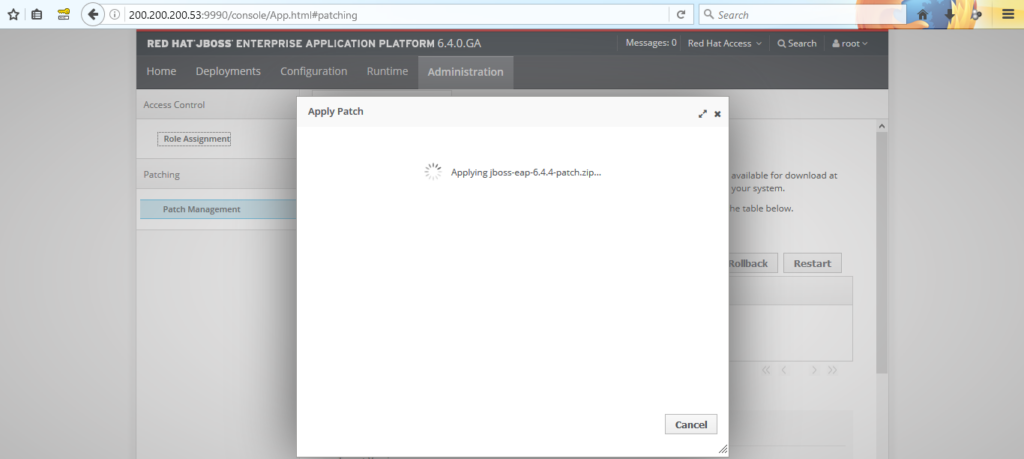
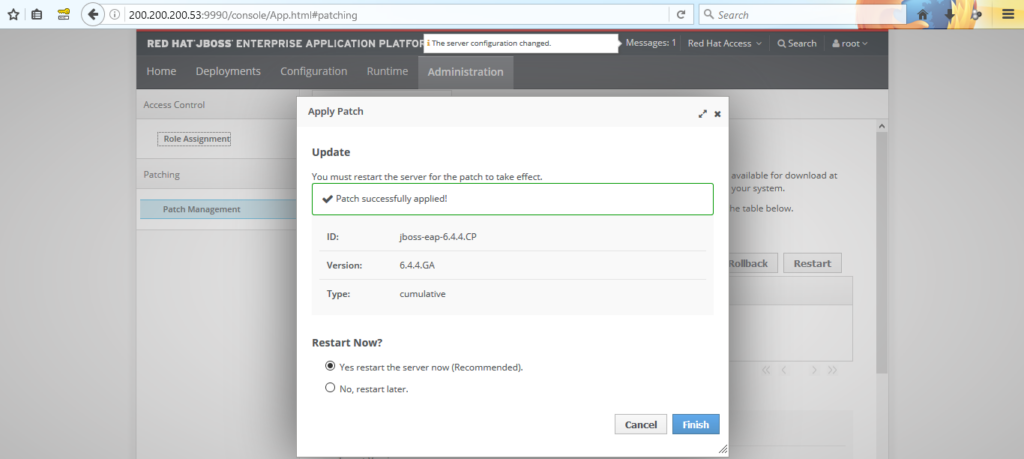
► Choose Yes restart the server now to complete patching process
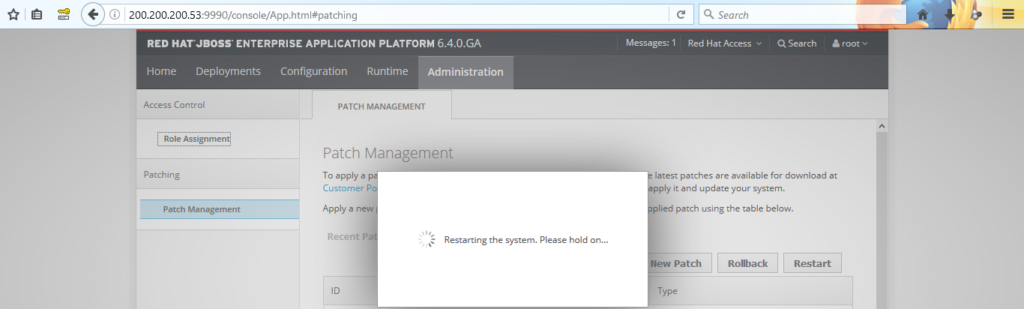
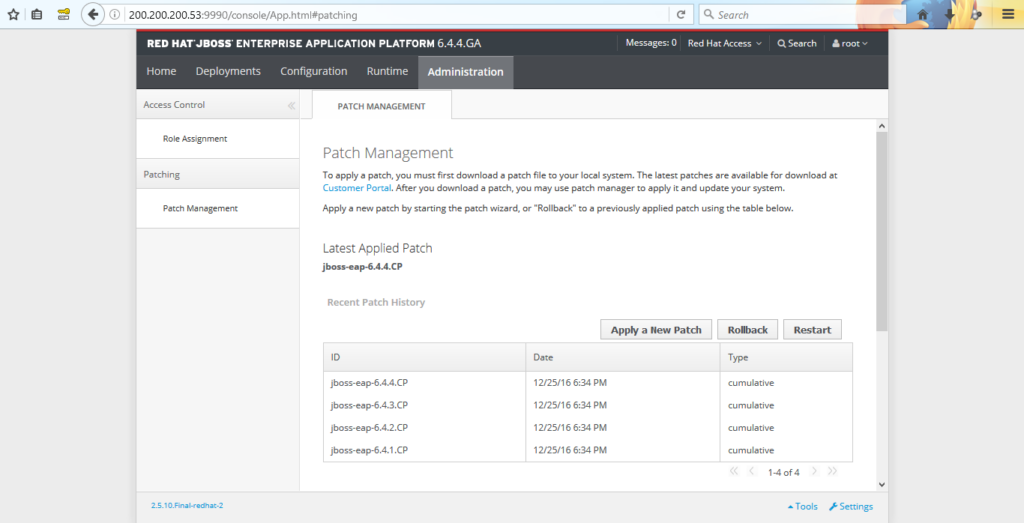
Patching is done. JBoss EAP management is ready to use.
Finally, the installation of JBoss EAP for Java is done. On the next post I will post about Integrating JBoss EWS to JBoss EAP. See you on the next post!